Make a Catapult Out of Paper Towel Rolls


Catapults are an ancient device that were used to hurl objects over castle walls or barricades. When teaching students about medieval or ancient history, it can be exciting to show them how to create their own catapult out of simple craft materials, such as paper towel rolls.

Instructions

    1 Cut open 10 paper towel tubes vertically with scissors.
    2 Roll each tube up again tightly, and tape it with masking tape. This will cause the rolls to be more sturdy and they won't bend when you launch objects with your catapult.
    3 Tape the corners of three of the rolled tubes together so that they form a triangle.
    4 Repeat this process two more times until you have three paper-towel-roll triangles.
    5 Place two of the triangles together horizontally, and tape one of the sides.
    6 Splay open the connected triangles, and insert the third triangle into the space that is opened up. This will create a paper-towel-roll pyramid.
    7 Tape all of the sides of the pyramid.
    8 Place the end of the remaining paper towel roll into one of the bottom corners of the pyramid. Tape it into place. This will allow the arm to remain attached to the structure, while enabling it to be moved backward in order to hurl an object.
    9 Tape a small paper cup to the end of the paper towel tube arm with the cup facing upward.
    10 Loop a rubber band around the paper towel arm with the cup.
    11 Loop the same rubber band around the top of the pyramid.
    12 Tape the bottom pyramid to an 18-inch square of cardboard in order to stabilize it during use.
    13 Place an object into the paper cup, pull the cup back, and release the cup to launch the object into the air.

Making a Small Catapult That Looks Like an Original


In the ancient and medieval periods, catapults were used as siege weapons, capable of hurling projectiles such as boulders, flaming barrels of pitch or even beehives at enemy fortifications and cities. There were several types of catapult, some of which used counterweights and others that used torsion to store potential energy. Because the mechanical principles of the torsion catapult are simple, it's easy to make a small-scale replica that resembles the original and really works.

Instructions

    1 Cut parts for your catapult out of wooden rod and sheet using a craft knife or saw. You will need two long sections to form the base of the catapult, a throwing arm and five short sections. You will also need two triangular supports cut from a flat wooden panel. The throwing arm should be five-sixths of the length of the base pieces. If your base pieces are a foot long, for example, the arm should be 10 inches. The short sections should be half the length of the arm, and the triangular supports should be slightly taller than one of the short sections.
    2 Scrape the wooden sections with a wire brush to weather them. You may wish to stain them to give them a darker appearance.
    3 Attach a short section to one of the base pieces at right angles. The upright should be a short distance from the forward edge of the base piece. Use wood glue to hold the upright in place. Repeat this process for both base sections.
    4 Screw or nail a triangular support to both the upright and the base section, connecting them and adding extra rigidity. Again, do this for both base pieces.
    5 Glue two short sections between the base pieces. They should be attached to the underside of the bases at the front and rear.
    6 Insert the final short section as a crossbar by gluing it to the rear of both uprights at the top.
    7 Drill a hole in the base sections. The hole should be as large as you can make it without damaging the base. Position the hole slightly to the rear of the uprights, and make sure the two holes are aligned.
    8 Drill a hole in the end of the throwing arm. It can be smaller than the holes in the base piece.
    9 Cut a length of string or twine. The exact length will vary depending on the thickness of the string and the size of the catapult. A foot-long catapult can need up to 30 feet of string. Tie a length of heavy wire, like coat hanger wire, to the end of the string.
    10 Tie the opposite end of the string to a length of dowel. Using the wire like a needle, thread the string first through the hole in one base piece, then through the hole in the arm, then out of the hole in the opposite base piece. Wrap the string around another length of dowel and thread it back through the hole, repeating the process in reverse.
    11 Repeat this process until the string is used up or can no longer fit through the holes. After the first three or four passes, you no longer need to thread the string through the hole in the arm. Instead, pass it behind the base of the arm on the first pass, then in front of it on the return until the arm is wrapped tightly between two layers of string.
    12 Build a basket to hold your projectile, using scrap wood or cardboard. You can glue or pin this to the upper surface of the head end of the throwing arm.
    13 Insert a screw hook into the head end of the throwing arm. Insert hooks into the base pieces so that they line up, then depress the throwing arm and run a length of wire through all three hooks. To launch the catapult, load the projectile into the basket and pull the wire out.

How to Make Catapults Using a Paper Clip


How to Make Catapults Using a Paper Clip

The ancient Greeks used catapults to hurl projectiles, such as large rocks, at their enemies. The most simple catapult requires two mechanical parts: a lever and a spring. You can make your own catapult out of a paper clip and other office supplies you probably have in your desk -- even if it will not fire a stone over a rampart, Use it to fling wads of paper at an opponent or to teach a child about levers and springs.

Instructions

    1 Look at the paper clip. Each clip has an outer loop of wire and an inner loop of wire that is formed with an end of the wire. Grasp the top of the loop of the inner ring and pull it out so that it stands at about a 45-degree angle from the outer ring. The large loop forms the base of your catapult while the smaller loop makes the arm.
    2 Bend a holder into the catapult. Arrange the paper clip so that you look at it with the arm in the air and pointed away from you. Grasp the end of the wire that forms the inner loop with needle-nosed pliers. Bend it 90 degrees inward to close the loop. Now grasp the wire halfway between the bend you just made and the top of the loop. Bend it toward you so that a section of wire in the shape of an "L" stands away from the arm. This forms the frame for your projectile holder.
    3 Cut a strip of cardboard slightly wider than your paperclip catapult and about half the length of its base. Bend the strip of cardboard in half lengthwise, then place it so that it rests on the frame for your projectile holder. Half of the strip should rest along the top part of the arm, while the other half should rest on the "L" shaped piece of metal that sticks out from the arm. If cardboard is unavailable, you can use a piece of plastic or a strip of tape folded over on itself with the sticky side on the inside of the fold.
    4 Attach the cardboard strip to the catapult with two strips of tape. Use one strip to attach it to the top of the arm of the catapult and one strip to attach it to the frame for the projectile holder. Place a projectile, such as a wad of paper, in the projectile holder and hold down the base of the catapult. Pull back the arm toward the base; then release it to fire your new catapult.

What Is a Torsion Catapult?


What Is a Torsion Catapult?

A torsion catapult, or mangonel, is a type of catapult used frequently in Medieval siege warfare. The mangonel works by twisting up a rope as tight as possible on the end of a throwing arm. When the torsion in the rope is released, the throwing arm shoots whatever it is holding with great speed and power.

Rope Spring Power

    The torsion catapult was invented by the ancient Greeks around 300 BC. The torsion catapult is based on the concept of the rope spring -- a rope coiled so tightly that it produces tremendous power when released. A torsion catapult looks much like any other type of catapult, with a throwing arm attached to a large base to provide stability and a large wooden beam to stop the throwing arm so that it shoots the projectile rather than slamming into the ground. Between the two sides of the catapult base is a length of rope, which can be wound tighter and tighter by a winch. This is what provides the torsion for the catapult.

Effectiveness

    Although they had actually been invented centuries before by either the Greeks, torsion catapults or mangonels were not widely used in early Medieval warfare. Their first known use in England was in the Siege of Dover in 1216. From this point on, however, they were widely used. A mangonel was extremely powerful, capable of hurling a rock the size of a human head at the speed of 100 mph and for distances of up to 1,300 feet.

Projectiles

    The mangonel was generally used to throw large rocks but could also be used to throw a wide variety of other items, depending on the ingenuity of the user and the availability of materials. Hot sand, when thrown, would find its way between the gaps in the armor of a defending knight. Diseased corpses could be hurled to spread infection in the enemy camp -- an early form of biological warfare. Burning tar could be thrown as a medieval equivalent of napalm.

Disadvantages

    The torsion catapult did have some disadvantages. If the rope spring got too wet, it wouldn't work, so any day of heavy rain could earn the defenders of a besieged castle a day of respite from the attacks of the mangonel. In addition, the accuracy of any siege weapon depends on determining a precise range from which to shoot. However, the mangonel didn't shoot with consistent power because no one could be certain to put the exact same amount of torsion on the rope each time it was used. The mangonel would not be effective at consistently striking the exact same target such as a particular tower in a castle.

How to Build a Wood Catapult With a Weighted Basket


How to Build a Wood Catapult With a Weighted Basket

In the era before the use of gunpowder weaponry made them obsolete, castles formed the indispensable heart of warfare in Europe. Their construction was one of the primary expenses of any government, and no warlord could be successful without the skill and technical know-how to be successful at siege warfare. One of the primary goals of siege warfare was to break down the stone walls of the castle. For this purpose, large mechanical devices were constructed to fling stones at the high walls. Among the most successful of these was the trebuchet, a type of catapult, which used the power of a falling weight to swing the throwing arm from which the projectile would be propelled. A small model of a trebuchet will provide a look into the rich history of Medieval Europe.

Instructions

    1 Cut two 1.5-foot lengths and two 2-foot lengths of 1-by-2 lumber. Lay one of the 2-foot lengths on your work surface with the 1-inch side facing down. Lay another parallel to it so that the outside faces of the two pieces are 1.5 feet apart. Apply glue to their ends and link them together at the ends with the 1.5-foot pieces to form a 2- by 1.5-foot rectangle. This will be the base of the trebuchet model. Hammer a finishing nail into each joint, and attach a pair of bar clamps to hold the parts together as the glue dries. Allow this assembly to dry before removing the clamps and continuing.
    2 Cut two 2-foot lengths of 1-by-2. These will be the support columns that hold up the arm of the trebuchet. Use wood glue and nails to fix them to the insides of the 2-foot base sides halfway between the narrow ends of the base. Clamp the support columns in place with spring clamps. Cut two more 1-by-2 segments long enough to connect the 2-foot sides of the base together. Glue or nail the pieces to the inside of the base on either side of the support columns, which helps to hold the support columns upright. Viewed from above, the base should be a rectangle with its long sides connected together by four lengths of wood -- the two at the ends and the two that are helping hold the support columns in place. Use clamps to hold all the pieces in place as the glue dries. Allow the glue to dry before removing the clamps and continuing.
    3 Cut four lengths of 1-by-2 long enough to connect the corners of the base with the support columns at a point 1 inch below their tops. These diagonal pieces will help keep the support columns from shifting forward and back when the arm of the trebuchet swings. Each piece should start at a corner, rising to meet the support column on the same side of the base as the corner from which it originated. Cut the ends at a diagonal so they can meet at the tops of the support columns; don't extend below the bottom of the base in the corners. Fix them in place with glue and a single nail at each end, and clamp them until the glue dries.
    4 Drill a 3/8-inch hole in the top of each support column centered 1/2 inch from the top. These holes should allow a dowel to connect the two sides of the model together, forming the pivot for the arm of the trebuchet. Cut a 1.5-foot length of 3/8-inch dowel to serve as the pivot.
    5 Cut a 3-foot length of 1-by-2. This will be the arm of the trebuchet. Drill one 3/8-inch hole through the 2-inch side of the arm, 1 foot from one end of the arm, and two 1/4-inch holes 1/2 inch in from each end of the arm. The larger hole will be where the pivot goes through, and you will use the smaller ones to attach the weight that pulls the arm and the sling that throws the projectile.
    6 Cut out a 3- by 12-inch section of strong cloth (nylon will do well) to make the sling. Cut a 2-inch line in the middle of one of the 3-inch sides to make two "tails" on the sling. Tie these through the hole in the end of the arm that is 2 feet from the pivot. Hammer a nail into this end of the arm so that 3/4 inch of the nail projects from the end surface. Use wire clippers to cut the head off the nail, so that it is a smooth shaft. Cut a small hole in the far end of the sling, which will fit over the nail.
    7 Attach the arm by putting the dowel (pivot) through one of the support columns, then the hole in the arm, then the other support column, so that an equal amount of excess dowel projects from each support column.
    8 Cut a 1- by 1-foot section of fabric to use as a pouch for the weight. Cut a hole in each of the four corners. Place the weight (a brick or pile of fishing weights works well) on the center of the fabric and gather it up around the weight. Cut a piece of string, and push the end of it through the holes in the corners of the cloth. Put the other end of the string through the hole in the end of the arm that doesn't have the sling attached to it, and tie the two ends together.
    9 Cut a 4-inch by 2-foot section of cardboard and position it so that it runs on top of the base components down the center of the long axis of the model. Staple it in place.
    10 Fire the trebuchet: first push the end of the sling with the hole in it down over the end of the nail at the end of the arm. Holding the sling-end of the arm down near the ground, place a stone, marble or other projectile in the sling and lay the sling on the cardboard strip running down the middle of the frame. When you let go of the arm, the weight should pull its end down while the other end flings the projectile. If the sling lets go of the projectile too soon (the projectile flies in too high of an arc or even backwards), bend the nail forward slightly. If it releases too late (the projectile flies too low or strikes the ground immediately), bend it back.

Make a Catapult out of a Hanger and a Spoon


Catapults were often used in medieval times as a form of weapon in battle. These weapons allowed warriors to fire upon their opponents from further away or to launch projectile weapons over high castle walls. While catapults are no longer needed for the purpose of fighting a battle, you can create your own model catapult to show how the original weapons worked. One of the ways you can build your own catapult is to use a metal hanger and spoon to launch your projectile.

Instructions

    1 Cut the wire hanger at one of the bottom corners. Make a second cut next to the curved hanger portion at the top. Make the second cut on the side of the curved portion away from where you made the first cut. This removes one entire side of the triangle, as well as the curved hanger.
    2 Set the flat bottom portion of the wire hanger on the piece of cardboard or wood to serve as the base. The angled portion of the wire hanger should be facing up. Tape the wire hanger to the base with duct tape.
    3 Position the spoon along the angled portion of the wire hanger so the spoon extends beyond the cut end of the hanger with the spoon portion facing toward the ceiling away from the wire piece. The handle of the spoon and the wire should overlap. Tape the spoon into place by wrapping duct tape around the spoon handle and wire.

Fling a Catapult

A catapult, or trebuchet, uses a counterweight to fling a stone or rock. The catapult has a long arm with a heavy weight on one end and a sling on the other. The weight falls, pulling the other end of the arm up. The sling rotates around the catapult vertically, going over the top of the catapult. One end of the sling unhooks from the arm and the rock is thrown down range. Loading and firing a catapult should be done safely.

Instructions

    1 Aim the catapult by sighting along the trough or tray where the sling rests and point it toward the target. Catapults must be aimed using two components: direction and range. Sighting along the tray will give you the direction. Range must be determined by trial and error.
    2 Calculate the range of the throw. Catapults have an ability to throw rocks high and short or midway and long. The angle of the peg and the length of the sling determine the trajectory of the throw. Bending the peg toward the back of the catapult will result in a late release of the weight, which means the rock will be thrown low and short. Bending the peg away from the back will give the shooter a high, short shot which will drop down on the target. It might also send the stone straight up or backward. Beginning users of the catapult should always use the neutral setting of the peg. This produces a shot that leaves the sling at a consistent 45-degree angle.
    3 Arm the catapult. Pull the long arm of the catapult down and hook it into the trigger attached to the frame. Ancient catapults used horses or men walking inside large barrels like those used by hamsters for exercise to pull the arm down.
    4 Load the catapult. Place the rock or other object in the sling and lay it down along the trough. Hook the end of the sling onto the peg or notch at the end of the long portion of the arm.
    5 Pull the trigger and watch the rock slide along the trough and gain speed as it is lifted in the air and flies down range.

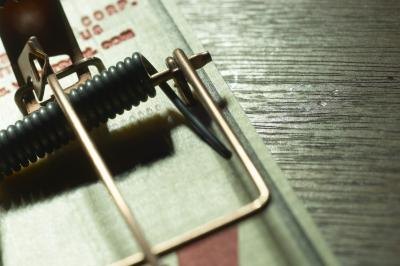
How to Make a Catapult Out of an Engaged Rat Trap


How to Make a Catapult Out of an Engaged Rat Trap

Making a rat-trap catapult is not just an inexpensive and entertaining project that you can do with your kids, but an opportunity for an impromptu physics lesson where you can explain about motion, forces, levers and energy. The catapult will cost around $5 to make and take 10 to 15 minutes to construct. The kids can use marshmallows, screwed-up scraps of damp newspaper or pieces of candy as ammunition and have competitions to shoot the furthest and/or most accurately.

Instructions

    1 Remove the trigger mechanism, which is to one side of the central spring, using pliers and a screwdriver, if you need one, to prise the mechanism away from the base. Also remove the trigger arm. This usually fixes across one half of the engaged trap to hold the square trap wire, or snapper, in place.
    2 Pull the snapper up from the base and place a tongue depressor underneath its width. Adjust the depressor so that the side nearest the top of the snapper lies flush along the top wire. Centralize the tongue depressor so that equal lengths jut out on either side of the snapper and secure it in place with duct tape.
    3 Take a second tongue depressor and tape it so that it vertically crosses the first one at the bottom and, when the snapper is vertical, this depressor is too. Use plenty of duct tape to firmly secure the construction.
    4 Tape the handle of a plastic spoon along this depressor leaving its bowl jutting out above the top. The back of the spoon rests against the front of the depressor which faces away from the snapper. Use many layers of tightly wound duct tape to create a firm bond.
    5 Pull the snapper back against the resistance of the spring using the sides of the horizontal depressor to help you. For maximum firepower, pull the construction back fully so that the snapper is in its usual position when the trap is engaged. Press down on the horizontal depressor while you load the spoon bowl with ammunition. Hold the rat-trap base flat on the work surface with one hand ensuring that it is not in the way of the firing mechanism. When you are satisfied, release the firing mechanism.

Making Catapult Baskets


Catapults are devices used to hurl objects a great distance. They were invented by the Greeks, and used as effective war weapons against enemy fortifications throughout the Middle Ages. Catapults used a winch system to create tension in an arm holding a catapult basket. The basket was filled with stones and when the arm tension was released, the rocks would race toward a target at great speed. Modern-day replicas of catapults come in three basic designs with three unique basket types. If you already have your model catapult built, the time is right to add a basket in one of these three styles.

Instructions

    1 Carve a bowl-shaped depression directly into the end of the catapult's throwing arm. The objects to be thrown can be placed inside this depression. This basket type is used for a fused-arm catapult where the basket and arm are made of one piece.
    2 Attach a wide plastic, wood or metal bowl to the end of the throwing arm to create a catapult basket with greater capacity than the fused-arm catapult's depression basket. Drill through the bottom of the bowl and attach the bowl to the throwing arm with screws. Do not use nails or glue because nails will pull out over time and most glue won't hold, as the force generated by the catapult is considerable.
    3 Assemble a sling out of sturdy cloth such as burlap or nylon. Cut the cloth into a square and cut holes about an inch from each of the four corners. Tie a piece of rope between the holes in the corners on one side of the cloth and tie another piece of rope between the holes in the corners on the other side of the cloth. The resulting creation will resemble a hammock. To use a sling basket on your catapult, the throwing arm must be altered. Insert a round dowel through the width of the throwing arm at its end. Hang the sling basket from this dowel. Secure the loops of the sling by using additional rope to tie the loops to the dowel.

Cotton Ball Catapult

Catapults have been used throughout history to launch heavy objects into an enemy's camp and hurl items long distances and over walls. Building your own catapult is a perfect science experiment for learning about tension and seeing firsthand the power that it can create. You can make a simple cotton ball catapult using some basic materials that you may already have in your home. Once you gather your materials, the entire process should take less than five minutes.

Instructions

    1 Cut off the top of a small box. A long tissue box works well for a catapult. Just use a box cutter to remove the top of the box where the tissues come out, cutting right at the edges. Turn the box upside down. This will be the frame for your catapult.
    2 Make a cut into the box just big enough to insert your spoon handle. The cut should be about 2 inches from one end of the box. Slide the tip of spoon handle into the box. Tape the spoon into place by turning the box on its side and wrapping masking tape around the tip of the handle inside the box. Then, wrap masking tape around the spoon handle outside of the box, just above the top of the box. This will keep the spoon from sliding down into the box as you use your catapult.
    3 Attach two rubber bands to the spoon. Wrap each rubber band around the handle of the spoon and pull one end of the rubber band through the other end to hold it into place.
    4 Attach the rubber bands to the box. You can either tape the rubber bands to the edge of the box on the outside, or you can cut small slits in the box right at the edge and tuck each rubber band into a hole. Place your slits about 1 inch to either side of the spoon. Pull each rubber band so that it gives just enough slack for the spoon to stand upright. Tape the rubber bands to the box. If you have made slits in the box and tucked the rubber bands in, you will be taping them to the inside of the box.
    5 Launch a cotton ball. Just place a cotton ball on the spoon, pull it back until it nearly touches the box and release. You have made your very own cotton ball catapult.

Building a Small Catapult for Kids That Launches Golf Balls


Catapults are mechanisms that were widely used in medieval warfare to attack and defend. They were originally constructed to hurl missiles, such as spears, but were later used to throw large stones and pots of boiling oil at the enemy. Catapults have even been used in modern times to launch aircraft from warships. Making a model catapult with your child can be an enjoyable way to help him understand this piece of history -- while launching golf balls instead of boulders.

Instructions

    1 Smooth the edges of the block of wood and the small cube of wood with the sandpaper.
    2 Lay the larger piece of wood on one of its 2-inch sides, then glue the clothespin to the wood lengthwise, making sure the clothespin is centered. Allow it to dry.
    3 Glue the 1-inch wood cube to the top of the open end of the clothespin, making sure the cube is centered. Allow it to dry.
    4 Glue the jumbo craft stick to the wood cube, matching one end of the craft stick to the edge of the cube that is closest to the closed end of the clothespin. Allow it to dry.
    5 Glue the bottle cap flat side down to the top of the craft stick at the end not affixed to the wood cube. Leave enough room at the end of the craft stick so you're able to push it down. Allow the glue to dry completely.
    6 Place a golf ball in the bottle cap, push down on the craft stick, and fire your new medieval war machine.

Tips on How to Make a Toy Catapult With Recycled Materials


When you are learning about ancient machines, such as catapults, it can be difficult to picture how these machines actually worked and functioned. This can cause your understanding of the machines to be limited. One solution is to construct a model of a catapult that you can use to launch objects across your room. You can even construct a basic catapult using a few different recyclables that you have lying around your house.

Instructions

    1 Heat up a hot glue stick inside of a hot glue gun for five minutes by plugging it into a wall outlet.
    2 Place an empty, clean soda can horizontally onto a tabletop.
    3 Squeeze a dime-sized dollop of hot glue onto the middle of the soda can, then press a craft stick vertically onto the hot glue dollop. Position the craft stick so that the end is pressed onto the hot glue and the length of the stick extends up from the can. Allow the hot glue to cool for five minutes, then turn over the can.
    4 Squeeze a pea-sized dollop of hot glue onto the end of the craft stick that is extending up from the can, and place the flat end of a bamboo skewer onto the dollop. Position the skewer so that it falls back against the can in a 60-degree angle. Allow the hot glue to cool for five minutes.
    5 Squeeze a pea-sized dollop of hot glue onto the extended end of the bamboo skewer, then press a paper cup onto the hot glue dollop. Position the paper cup so that it is facing upward. Allow the hot glue to cool for five minutes.
    6 Place an object into the cup, hold onto the can with your hand, pull back the cup and release to launch the object through the air.

A Guide To Make a Model of a Greek Catapult

Making a model of a catapult is a creative way to embrace Greek history. Developed in 400 B.C. during the Dionysius Empire, according to Smith College, the catapult represented a major weapon of war that hurled large and heavy objects long distances toward enemy targets. Creating a paper mache model catapult is ideal for children and beginner art students since the medium is inexpensive and flexible, highly suitable for craft making. Show off the model as a mantelpiece or art project, or during a Greek history festival.

Instructions

    1 Place two 2 x 2 x 6-inch Styrofoam catapult base bars onto a work surface. Adjust the bars so they're parallel with one another and the six-inch edges are facing you.
    2 Measure one inch toward center from the left edge of each bar. Carve a 1/4 x 1/2 inch hole the center of one each bar at this point. Insert a 1/2 x 1/2 x 3-inch Styrofoam cylinder rod into each hole to connect the bars. The bars and rod should now form a letter "U" shape.
    3 Bond three 2 x 2 x 3-inch Styrofoam catapult frame pieces together with permanent epoxy to form a "U" shape. Bond the short ends of the 2 x 2 x 3-inch "U" to the top left side of the catapult bars with permanent epoxy.
    4 Measure one inch toward center from the right edge of the near catapult bar. Carve a 1/2-inch-wide hole through the long sides of the near catapult bar at this point with a craft knife. Carve a 1/4 x 1/2 inch hole into the inner long side of the far catapult bar. Insert a 1/2 x 1/2 x 5-inch Styrofoam cylinder rod through the hole in the near catapult bar and into the hole in the far side car. The 1/2 x 1/2 x 5-inch rod acts as a winch for the catapult.
    5 Bond the short end of a plastic spoon to the center of the right side 3-inch cylinder foam rod with permanent epoxy. The body of the catapult is now complete.
    6 Boil five cups of water and one cup of flour in a pot for three minutes to create a paper mache mix. Allow five minutes for the mix to cool and then pour it into a bowl.
    7 Soak a 1 x 5-inch newspaper strip in the mix. Press the strip into the body of the catapult. Continue until the entire catapult is covered in one layer of newspaper.
    8 Soak a 1 x 5 inch paper towel strip into the mix. Press the strip into the body of the catapult. Continue until the entire catapult is covered in one layer of paper towel. Allow three hours for the craft to dry.
    9 Coat the catapult with brown acrylic paint to emulate the wood used by Greek military personnel to build real catapults. Allow two hours for the craft to dry.
    10 Wrap an eight-inch string one time around the neck of the spoon beneath the wide head. Bond the short ends of the string to the five-inch winch rod. Twist the winch rod until the string is wound and the spoon is laying flat. Explain to observers that after the catapult was wound tight, a heavy object was placed onto the "spoon-like" head. The winch was released and sent the spoon flying upward to a 90-degree angle, launching the object into the air.

Make a Handheld Catapult


How to Make a Handheld Catapult

Early catapults first appeared on the battlefield back in 300 A.D. The basic catapult design has stayed the same over the centuries, and is still used today in aircraft carrier launchers. Handheld catapults are fairly simple to make and can easily fit in the palm of your hand.

Instructions

    1 Prepare the Popsicle sticks. Cut three Popsicle sticks into 2-inch lengths. Cut six Popsicle sticks into 4-inch lengths. Cut one Popsicle stick into a 4-inch length with one rounded end, Cut one Popsicle stick into a 3-inch length with one rounded end.
    2 Build the base. Tape two 4-inch sticks and two 2-inch pieces together end to end--short, long, short, long. Fold the Popsicle stick line into a rectangle and tape the open ends together. Tape a 2-inch Popsicle stick to the inside of one of the 2-inch sticks in the rectangle for reinforcement. Use plenty of tape on either end but none on the center of the stick.
    3 Tape two 4-inch Popsicle stick together side by side. Tape another pair of 4-inch Popsicle sticks side by side. Tape one pair of taped 4-inch sticks to the top of your rectangle, covering the rectangle at one side. Tape another pair of 4-inch sticks to the top of the rectangle on the other side, leaving a gap in the middle. Reinforce the corners of your base with tape.
    4 Build the hinge of the catapult and the arm. Tape one end of the rubber band to the rounded end of one 3-inch Popsicle stick. Reinforce with tape. Inset the stick with the rubber band into the base of your catapult. It should slide neatly in the side of the rectangle with two Popsicle sticks. Use a small screwdriver to open up the gap to make the stick fit in there. The stick should be able to stand up on its own with the end of the rubber band dangling down.
    5 Cut four pieces of tape about 2 inches long and stick them together so you have a thick layer of tape. Cut the tape lengthwise. Use the side of a Popsicle stick as a guide to mark two lines in the center of the twp pieces of tape. Tape one piece of marked tape to the flat end of a 4-inch Popsicle stick. Position the Popsicle stick so that the flat end meets the first of the two lines. Stick the other pieces of marked tape to the other side of the stick. Pinch the free ends of tape together and secure the marked tape to the stick with more tape.
    6 Assemble the catapult. Tape the catapult arm in the center with the hinge facing the catapult. Do not place tape between the two lines in the middle. Tape the end of the rubber band to the catapult arm. Without any tension the rubber band should sit at a 45 degree angle.
    7 Make the catapult cup. Cut a piece of paper into a 2-by-2 inch square. Fold the sides in about 1/2 inch on each side, then tape up the corners to form a square cup. Tape the cup to the catapult arm. It should be close to the end, with enough room for your finger to press the catapult.

Making a Catapult With Basic Parts


How to Make a Catapult With Basic Parts

You might need a catapult to destroy the action figures you've fortified in a Lincoln Log castle, or to lighten the mood during a late day at the office by lobbing paper clips into a friend's cubicle. Whatever the reason, they are easy to make using tools you've more than likely got lying around the house.

Instructions

    1 Make a rectangle measuring 10 inches by 4 inches using two long and two shorter wood strips. Hammer a nail into each of the rectangle's four corners, going through one strip of wood and into the other. This will form the base of the catapult.
    2 Make a 3-sided square with 4-inch strips of wood. Nail the two corners together.
    3 Raise the three-sided square vertically from the catapult's horizontal base. With the missing side facing down against the catapult's base, nail the 4-inch vertical sides into the horizontal base 3 inches from the base's corners. Ultimately, this vertical structure will stop the catapult's arm.
    4 Place a 5-inch strip of wood diagonally between the catapult's base and the top side of the vertical arm-stop. This strip of wood should be nailed to the midpoint of the 4-inch side of the base, 3 inches from the arm-stop uprights. Nail the other end of the diagonal strip to the midpoint of the arm-stop crossbar. This will strengthen the arm-stop so it won't fall over when hit by the moving arm. If you look at the catapult from the side, you should now have a right triangle with a 3-inch horizontal bottom, a 4-inch vertical height and a 5-inch diagonal hypotenuse.
    5 Drill a hole through the remaining 10-inch strip of wood. This will be the catapult's arm. This hole should be larger than the diameter of the 5-inch screw so that the arm can rotate freely around the screw. The hole should be 1 inch from the tip of the strip.
    6 Screw the 5-inch screw through one of the arm-stop's uprights. This should be done 1.5 inches from the catapult's base. Then run the screw through the hole in the catapult's arm and continue to drive the screw into the other upright. You should now have a base, an arm-stop and an arm that pivots.
    7 Nail a small cup to the tip of the catapult's arm.
    8 Screw a wire eye lag (a.k.a screw eye) into the base of the catapult just below diagonal arm-stop support. Screw your other wire eye lag into the side of the arm that will hit the arm-stop. Screw this lag in just below the cup.
    9 Run a rubber band from one wire eye lag over the arm-stop to the other wire eye lag. The rubber band should be small enough that it forces the arm to stand upright.
    10 Insert a projectile into the cup. Pull the arm back from the arm-stop until it rests horizontally against the base of the catapult. Release the arm and the rubber band should snap it upward, into the arm-stop, and fling your projectile out of the cup.

Building a Catapult With an Electronic Trigger

Catapults were created as war machines to break walls of castles. A catapult is a mechanical lever that tosses an object, such as a rock, in an arc at a target. To make your own catapult that can be triggered with an electronic switch, purchase supplies from a hobby store or electronics shop. Tools and supplies found in the home will be needed as well.

Instructions

Construct the Catapult

    1 Bend one end of a metal strip up to form a hook shape. Place the wood block on the table. Hold the metal strip vertically so the hook is at the top and bent toward you. Place the unbent end of the metal strip on the block near the edge closest to you.
    2 Hammer a nail through the strip at one end into the wood. Hammer a nail through the strip at the other end into the wood.
    3 Turn the block around. Pull the hooked end of the strip toward you until it touches the wood. Make a dot with a pencil where the strip touches the wood. Release the strip.


Electromagnet Switch

    4 Measure 24 inches of wire from the wire spool. Cut the spool at the 24-inch mark with a wire cutter. Measure 8 inches from an end of the wire and make a dot with a pencil. Measure another 8 inches on the wire and make another dot.
    5 Wrap the wire around the head of the nail at the 8-inch mark closest to one end of the wire. Wind the wire down to the point and back up again until you come to the other mark on the wire. Wrap strips of cellophane tape around the nail to hold the wire in place.
    6 Strip 1/2 inch of insulation from each end of the wire with a wire stripper.
    7 Apply a line of bonding glue to one side of the nail. Place the nail horizontally on the block against the dot that was made on it. Hold the nail against the block for a minute before letting go. Let the glue set overnight.
    8 Wad a piece of paper into a ball. Place your catapult on the floor with the end that has the nail glued to it facing you. Place a battery on its side next to the catapult.
    9 Tape the end of one of the wires to the bottom contact on the battery with a strip of cellophane tape. Tape the end of the other wire to one of the two contacts on the electronic switch.
    10 Measure 10 inches from the end of the wire spool. Cut the wire at the 10-inch mark with the wire cutter. Strip 1/2-inch from each end of the wire with the wire stripper. Tape one of the two ends of the wire to the top of the battery with a strip of cellophane tape. Tape the other end of the wire to the other contact on the electronic switch.
    11 Pull the metal strip toward you with your other hand. Press the end of the strip against the nail. Release the strip. Place the wadded up paper ball in the hook on the strip. Press the button on the switch to deactivate the electromagnet and release the strip so it can shoot the ball from your catapult.

Making a Catapult to Launch a Hacky Sack

Catapults are launching devices that have been used since the medieval era to launch everything from rocks to people to eggs. Regardless of the size of the catapult or the object being launched, the basic principles are the same: an object is placed on the end of a catapult arm and propelled into the air by the arm's movement. If you wish to build a simple, small sized catapult that can launch a hacky sack, you can do so in a few simple steps.

Instructions

Assembling the Frame

    1 Cut three 12-inch pieces out of the 3/4-inch by 1/2-inch wood strips. Cut an additional seven 6-inch pieces out of the wood strips and use a protractor to cut the ends of two of these strips at a 45 degree angle.
    2 Line one of the wood pieces with the angled edges up with one of the 12-inch pieces so that the two wood pieces form a 45 degree angle. The angled portion of the 6 -inch wood piece should be flush with the bottom edge of the 12-inch wood piece and positioned all the way at one end of the 12-inch wood piece. Secure the wood pieces together with wood glue and a 3/4 inch wood screw.
    3 Place a non-angled 6-inch wood piece so that its edge is flush with the remaining angled end of the 6-inch wood piece you secured in Step 2 and its bottom end is flush with the bottom edge of the 12-inch wood piece it is secured to. Secure this 6-inch wood piece to both the 12-inch piece and the angled 6-inch piece with wood glue and 3/4-inch wood screws. This assembled piece will serve as the side support for the catapult.
    4 Repeat Steps 2 and 3 to create another side support for the catapult.
    5 Stand the two side supports side by side exactly 6 inches apart. Connect them together by placing two 6-inch wood pieces on the front (the end closest to the uprights) and back end of the side supports and securing them in place with wood glue and 3/4-inch wood screws. You will now have a rectangular frame that measures 6 inches by 12 inches.
    6 Place the final 6-inch wood piece across the top of the frame's two uprights. Secure it in place with wood glue and 3/4-inch wood screws. This cross beam will stop the catapult arm when it is in motion and cause the catapult to launch the hacky sack.
    7 Drill a 2mm hole through the sides of the frame's two uprights. Position the hole near the base of the uprights to allow the catapult arm full range of motion. Screw an eye-hook into the middle of the frame's front beam to finish the catapult frame.


Assembling the Arm

    8 Cut off the top of a paper cup to create a small basket for the arm of the catapult. Screw the basket to the end of the remaining 12-inch wood piece with a 1/2 inch wood screw.
    9 Screw a second eye-hook into the catapult arm directly below the paper cup you secured in Step 1.
    10 Drill a hole through the side of the catapult arm at the opposite end with a 2-mm drill bit.

Assembling and using the Catapult

    11 Cut an 8-inch section of wire clothes hanger. Insert the wire through the hole at the base of one upright, through the hole at the end of the catapult arm and finally through the hole at the base of the opposite upright (make sure the catapult basket is facing up when you do so). Bend the ends of the wire to hold the wire in place.
    12 Attach one end of the rubber band to the eye-hook screwed into the catapult arm and the other end to the eye-hook screwed into the catapult frame.
    13 Place the hacky sack in the catapult basket, pull back the catapult arm and release to launch the hacky sack into the air.

Make Paper Catapults


How to Make Paper Catapults

The history of the catapult for use in battle originates with the engineers commissioned by Phillip of Macedonia who built the first ballista, or two-armed catapult. However, when it comes to children, building catapults out of paper is an appropriate activity when following up lessons on medieval history which kids will surely enjoy. Nevertheless, you have to tell kids that their catapults are only for outside of class and they are not to use them to hurt each other.

Instructions

    1 Lay your construction paper in front of you horizontally. Fold it in half from top to bottom, making a long horizontal crease through the middle of the paper.
    2 Fold the paper in half again two more times. You now have a long, skinny rod of paper.
    3 Fold the paper in half from top to bottom so that your skinny rod is half as long. Fold it in half again.
    4 Unfold the last crease you just made so that your rod of paper is in an "L" shape.
    5 Pull free a piece of tape from your roll of tap and wrap it around the right angle at the base of the crease. Keep rolling the tape around the piece of paper, working your way to the outer crease. Your goal is to wrap tape around half of the paper rod.
    6 Cut away the excess tape. Lay the untapped portion of your catapult flat against the table with the taped portion upright and vertical.
    7 Pull the taped portion towards yourself and release it to test its hurling capabilities. Adjust the flaps of the bottom portion as necessary.

How to Load a Catapult


Catapults, not to be confused with slingshots, were used in the battles of medieval Europe to propel large objects with lethal force towards enemy troops. Although catapults are of limited use in this day and age, it can be fun to make one with kids as a way of teaching basic physics. Once you've built your catapult, load it with ammunition before firing it.

Instructions

    1 Point your catapult in a direction away from other people.
    2 Pull the arm of you catapult back.
    3 Secure the arm and the basket of your catapult into place. The method for doing so will depend on the design of your catapult. You may have to do this manually with your hands.
    4 Place soft balls in your catapult's basket, being careful not overload it.

Make a Tiny Catapult


If you are bored at the office or want to teach your kids about physics, create your own tiny catapult. Catapults are accessible to a general audience yet can be part of a sophisticated science project. Use craft sticks and rubber bands to build a catapult to shoot marshmallows.

Instructions

    1 Stack seven craft sticks on top of each other, so they are exactly stacked. This is the frame for the tiny catapult.
    2 Wrap a rubber band on one end of the stack, approximately 1/2 inch from the end. Be sure it is tight. Tie another rubber band on the opposite end by wrapping it tightly.
    3 Stack the remaining two craft sticks together. Tie rubber bands at only one end about 1 inch from the end. This section is the beam, or the launching part, of the catapult.
    4 Insert the larger stacked craft sticks, with seven sticks, between the two craft sticks you just tied. Form a cross with the two stacks of sticks. The stack of seven sticks weighs down the other stack to form the launcher for the catapult.
    5 Tie a rubber band into a cross where the two stacks of sticks meet. This makes the catapult stronger. Place the spoon facing up on the craft stick that sticks up, which is also the top stick. The bowl should be just off the craft stick. Tie two rubber bands around the handle of the spoon to the top craft stick with the bowl of the spoon at the end. Be sure the bowl is facing up.
    6 Place a mini-marshmallow in the bowl of the spoon and press the spoon down gently. Release to shoot it.

Building a Shoe Box Catapult


How to Build a Shoe Box Catapult

When you think of catapults, you may imagine giant wooden devices used during medieval battles to hurl rocks over walls. Although it can be difficult to construct a real-sized catapult in the present day, you can build a working model of a catapult using materials found around the house, such as a shoe box. It won't allow you to hurl boulders -- but it will enable you to launch "rocks" made of wadded paper at your friends and family.

Instructions

    1 Take the top off of a standard size shoe box and discard it. You will be only using the bottom portion of the shoe box.
    2 Position the shoe box horizontally in front of you. Use a nail to poke a hole through the side facing you and the side facing away from you.
    3 Insert an unsharpened pencil through the two holes.
    4 Push the pointed end of a brass brad through the bottom of the shoe box directly underneath the pencil.
    5 Place a second unsharpened pencil standing up vertically in the shoe box. Tape it onto the horizontal pencil using electrical tape so that it is positioned perpendicularly to the first pencil.
    6 Tape a plastic spoon onto the vertical pencil using electrical tape so that the bowl of the spoon faces to the right.
    7 Wrap a rubber band around the brass brad and around the bottom end of the vertical pencil. Pull back the vertical pencil, place an object into the bowl of the spoon, then release the pencil to launch the object.

Making a Catapult out of a Cardboard Box

This summary is not available. Please click here to view the post.

Step-by-step to Build a Catapult


How to Build a Catapult in Steps

A catapult is a pretty simple mechanism, no more complex in principle than a teeter totter. One end is shorter than the other; a heavy weight goes on the short end; the long end does the launching. If catapult is built incorrectly it can tip over or release the projectile too early or too late. Build the catapult, then tinker with a few things once it's done to get it firing perfectly.

Instructions

    1 Cut the following lengths of lumber 2-by-4-inch lumber: three pieces at 2 yards long, three pieces at 1 yard long and four pieces at 4 feet long. Make a rectangle 2 yards long by 1 yard wide. Bolt the wood together with carriage bolts to create your base. Lay another 3-yard plank down the center of the rectangle lengthwise.
    2 Make isosceles triangles which stand up vertically from the each of the long sides of the base. They use the 2-yard lengths from the base as their bases and 4-foot lengths to form the other two sides. They need to be 1 yard high. Cut the ends of the 4-foot lengths so that they fit flush together and against the base. Bolt them together and place an additional 1-yard length vertically from the tip of the triangle to the base.
    3 Cut right angle triangles of hardboard about 8 inches on the longest side, place them over the angles where the wood is joined and nail them in place to give support to the structure.
    4 Drill a hole large enough for the metal tube through the last 1-yard length of lumber. Drill it 10 inches from one end. Drill a further hole 2 inches from the end and another 2 inches from the other end. Drill a hole through the lumber at the apex of each triangle and slide the metal tube through one, through the middle hole of the plank with three holes and out through the hole in the other triangle.
    5 Move the piece of lumber with the three holes in to a central position on the bar. This is your firing arm. Drill holes through the pipe a few inches on either side of where it comes out from each bit of wood. Put carriage bolts through these to keep the bar sliding to far from the central position.
    6 Put rope through the hole in the short end of the firing arm. Tie it through about 15 pounds of body building weights to it near the end of the firing arm.
    7 Cut a square of fabric 10 inches on each side. Tie rope to two diagonally opposite corners. Loop one end of the rope through the hole in the long end of the firing arm. Tie the other to the metal ring. Bang a large nail halfway into the firing arm next to the hole where the rope is tied. Bend it over and point the head toward the nearest upper corner of the plank. Cut the head off the nail.
    8 Place something like a tennis ball in the square of cloth. Slip the metal ring over the cut off nail. The tennis ball will be cradled in the cloth. Pull down the firing arm. Lay the tennis ball and ropes along the central plank. Make sure the aiming area is free of anything or anyone that could be hurt or damaged. Release the firing arm.